Slate Integration Setup
This guide explains how to configure Slate so Scholaro can send documents directly into your Slate instance.
The setup consists of four parts:
- Create a service account in Slate
- Create a source format in Slate
- Configure the webhook in Scholaro
- Remap the source format after the first file is received
Related Slate documentation
- User Accounts
- Importing Data with Web Services
- Creating a Custom Source Format
- Upload Dataset Stages
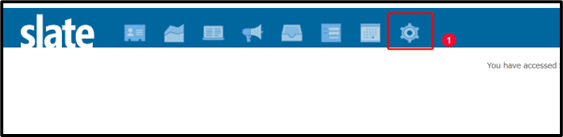
1. Create the service account in Slate
In Slate, go to Database -> User Permissions.
If needed, continue into the user permissions area.
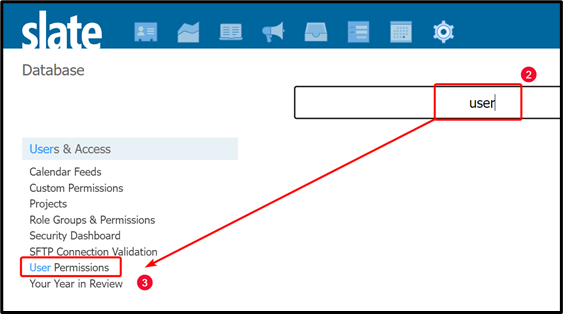
Click New User.
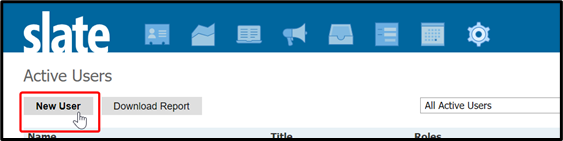
Create the service account with the following values:
- First Name: Scholaro
- Last Name: Service Account
- Email: Use a monitored email address that your team can access. You will use this same email again later.
- User Type: Service Account
- User ID: scholaro
- Password: Use a strong password and store it securely. You will need it again for the webhook configuration.
Example service account form:

Warning
Save the email address and password in a secure place. You will need both when configuring the webhook in Scholaro.
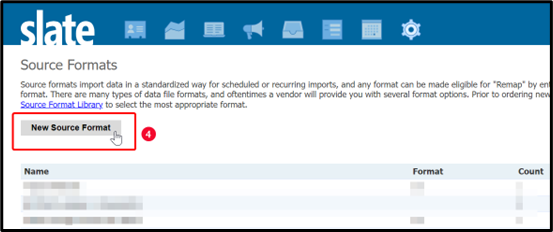
2. Create the source format in Slate
In Slate, go to Database -> Source Formats.
Continue into the Source Formats area if needed.
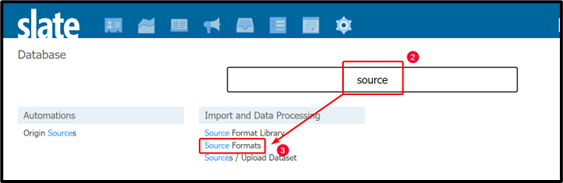
Click New Source Format.
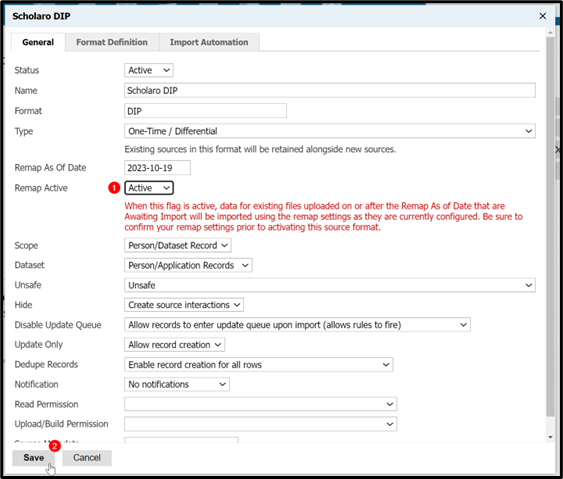
General tab
On the General tab, enter the following values. Do not click Save yet.
- Status: Active
- Name: Scholar DIP
- Format: DIP
- Type: One-Time / Differential
- Remap As Of Date: Today's date in
yyyy-MM-ddformat - Remap Active: Inactive
- Scope: Person/Dataset Record
- Dataset: Person/Application Records
- Unsafe: Unsafe
- Hide: Create Source Interactions
- Disable Update Queue: Allow records to enter update queue upon import (allow rules to fire)
- Update Only: Allow record creation
- Dedupe Records: Enable record creation for all rows
- Notification: Failures only
- Notification Email: Use the same monitored email address used for the service account
- Read Permission: Optional
- Upload/Build Permission: Optional
- Source Metadata: Optional
Note
You may set Notification to Successes and Failures if you want to receive an email every time the import runs.
Example of the General tab:
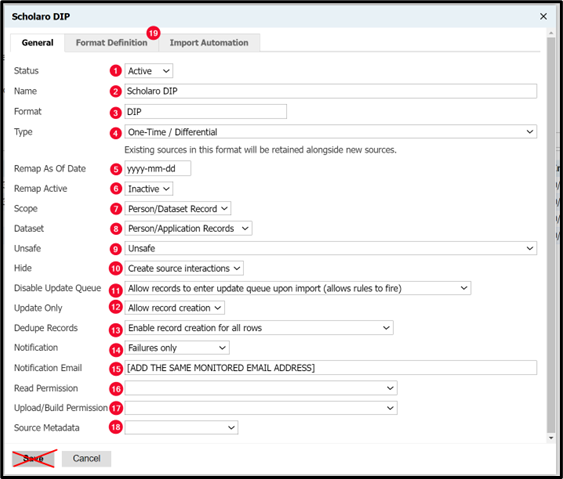
If you already clicked Save, that is fine. Open the source format again and click Edit to continue.
Format Definition tab
Go to the Format Definition tab and enter the following XML, then click Save.
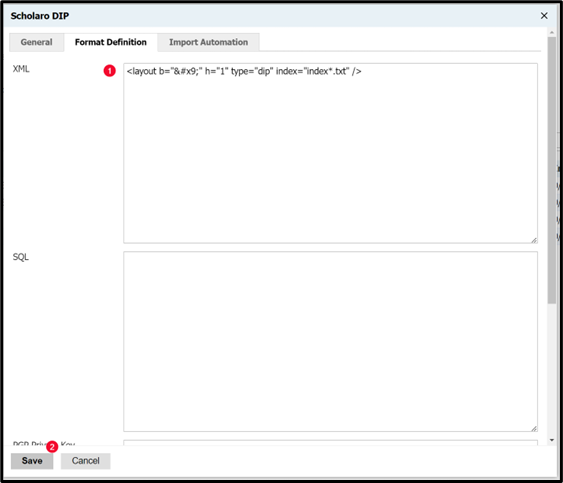
```xml
After saving, open the Web Services menu for the source format and locate the Standard POST URL.
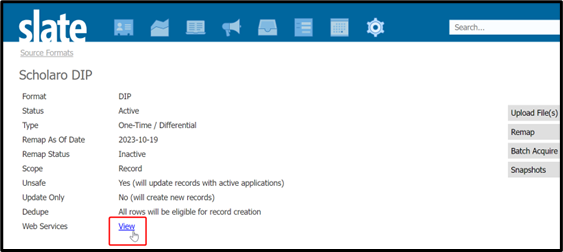
If your screen shows an alternate view, use the Standard POST URL shown there.
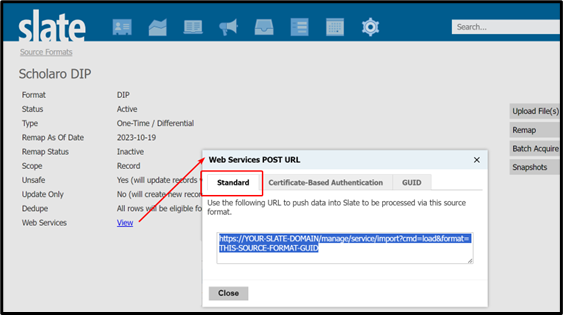
Tip
Copy the Standard POST URL somewhere safe. You will enter it in Scholaro in the next section.
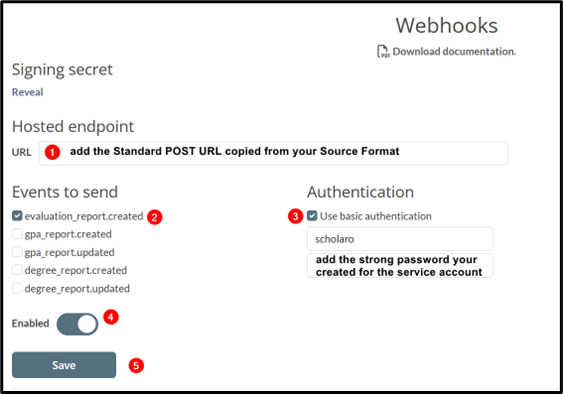
3. Configure the webhook in Scholaro
Log in to the Scholaro webhook page:
https://www.scholaro.com/app/developer/webhooks
Enter the following values:
- URL: Paste the Standard POST URL from the Slate source format
- Events to send:
evaluation_report.created - Authentication: Use basic authentication
- Username:
scholaro - Password: The service account password you created in Slate
- Enabled: Checked
Example webhook configuration:
Once saved, Scholaro will be able to send ZIP files into your Slate instance.
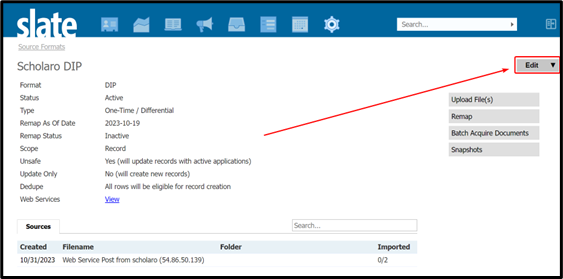
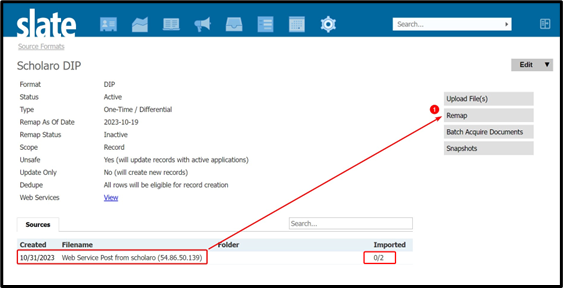
4. Remap the source format after the first file is received
After Scholaro sends the first ZIP file, return to the Scholar DIP source format in Slate.
You should see a successful web service post from scholaro. Once the file is ready for mapping, Slate will show imported rows and the Remap option will become available.
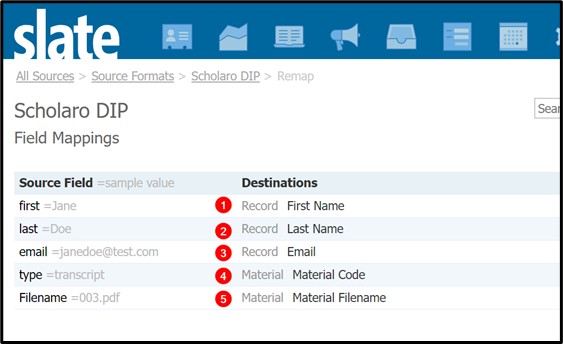
Field mappings
Click Remap and configure the following field mappings:
first-> Record > First Namelast-> Record > Last Nameemail-> Record > Emailtype-> Material > Material CodeFilename-> Material > Material Filename
Example field mappings screen:
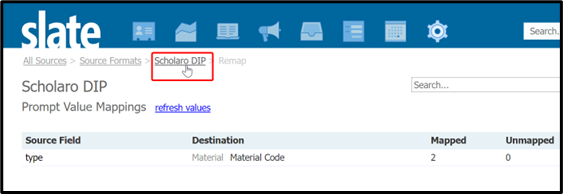
Prompt value mappings
Go to the Prompt Value Mappings screen and select the type source field.

Map the incoming document types to the correct Material Types in your Slate instance, then save.
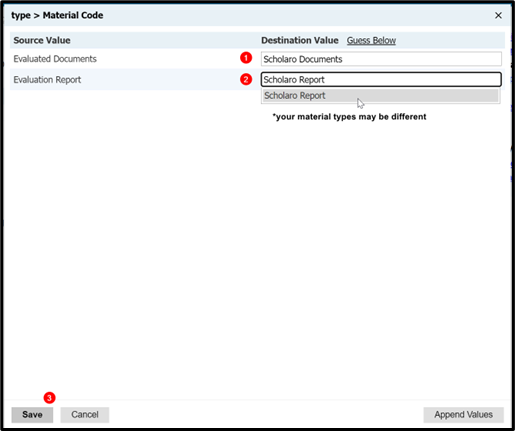
When finished, return to the source format.
Activate remap
Open the source format and click Edit.
Set Remap Active to Active, then click Save.
At that point, the source format should be fully configured for ongoing imports.
Summary
To complete the integration successfully:
- Create a Slate service account for Scholaro
- Create the Scholar DIP source format
- Use the source format's Standard POST URL in the Scholaro webhook
- Wait for the first ZIP file to arrive
- Complete field and prompt mappings
- Set Remap Active to Active
Once these steps are complete, Scholaro can send supported files directly into your Slate environment.