Microsoft Entra ID SSO Setup
This guide explains how to connect Microsoft Entra ID (formerly Azure AD / Microsoft 365) to Scholaro using OpenID Connect (OIDC).
Read Setting up SSO in Scholaro first. You will create the app registration here, create the connection in Scholaro with its details, then come back to add Scholaro's URLs — they do not exist until the connection is saved.
Prerequisites
- An administrator account in the Microsoft Entra admin center.
-
Later, the URLs from your connection's Setup URLs page in Scholaro. They look like:
https://www.scholaro.com/login/sso/oidc-12/callbackhttps://www.scholaro.com/login/sso/oidc-12/signout-callbackhttps://www.scholaro.com/login/sso/oidc-12/remote-signout
Note
Use the exact URLs shown on your connection's page — the examples above are illustrative, and the number in them is unique to your connection.
1. Register an application
In the Microsoft Entra admin center, open Entra ID -> App registrations (or type App registrations in the top search bar).
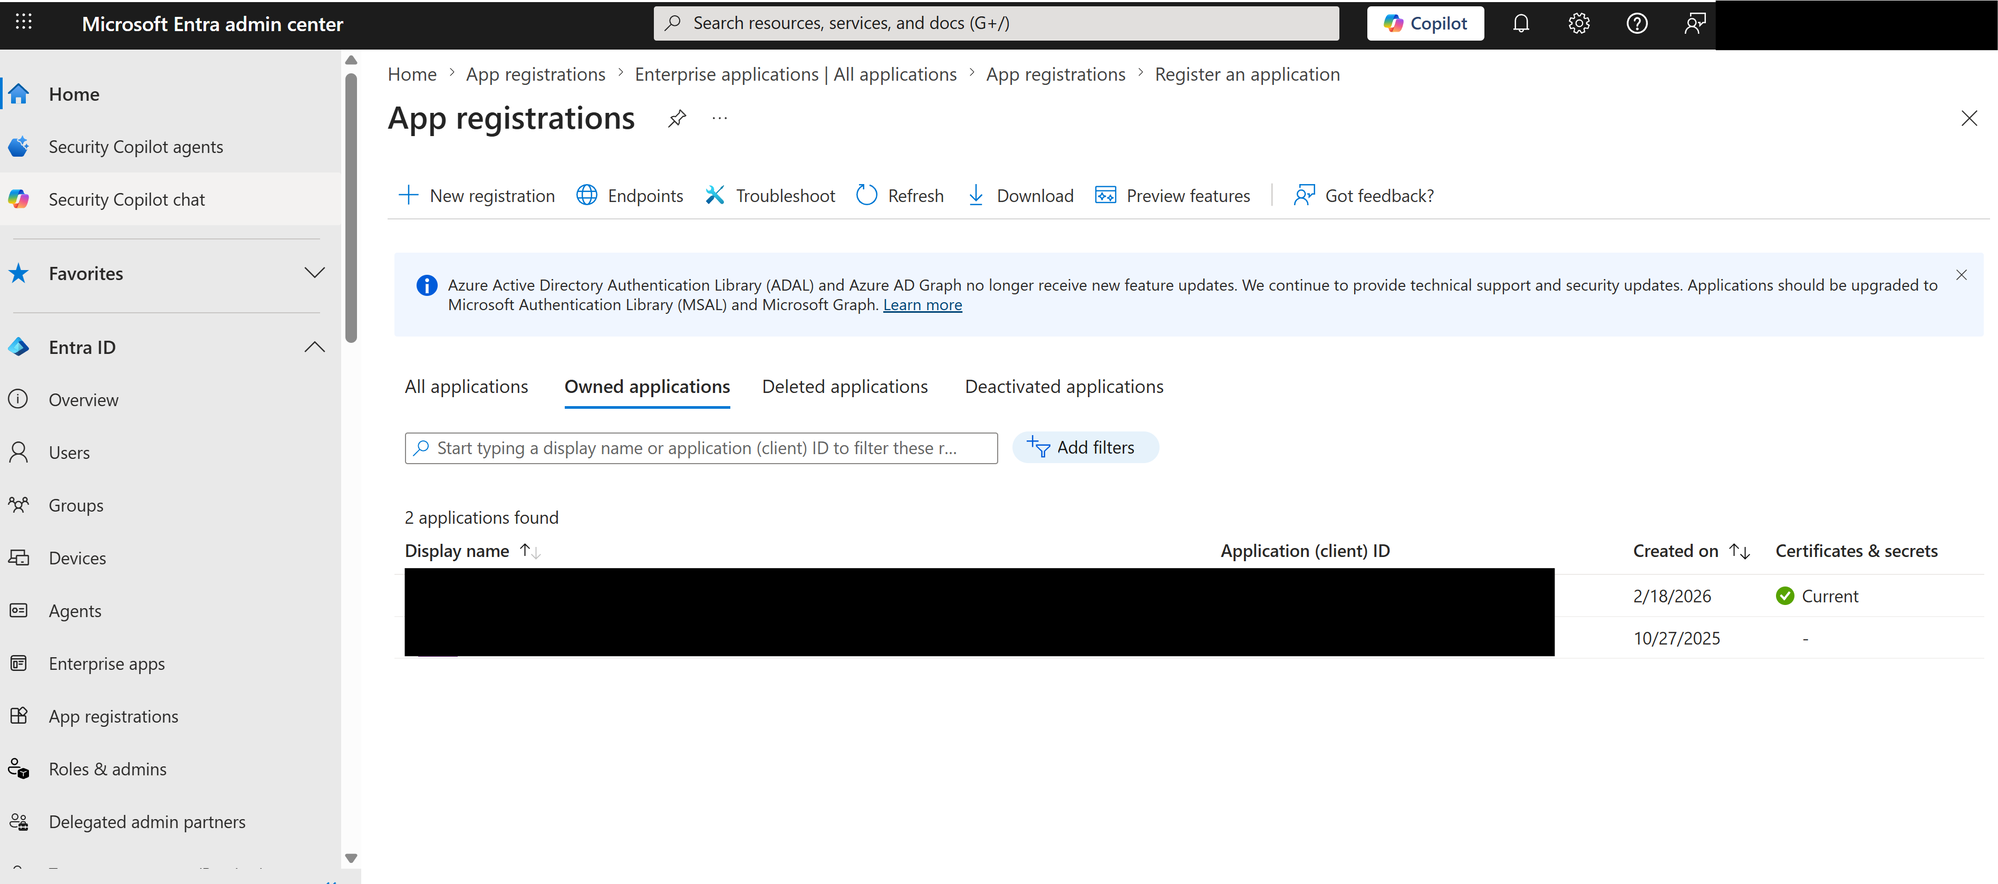
Click New registration, then enter:
- Name:
Scholaro SSO(or any name your team will recognize). - Supported account types: Single tenant only (accounts in your organization only).
- Redirect URI: select Web. If your Scholaro connection already exists, paste its Redirect URI; otherwise leave it blank and add it in step 7.
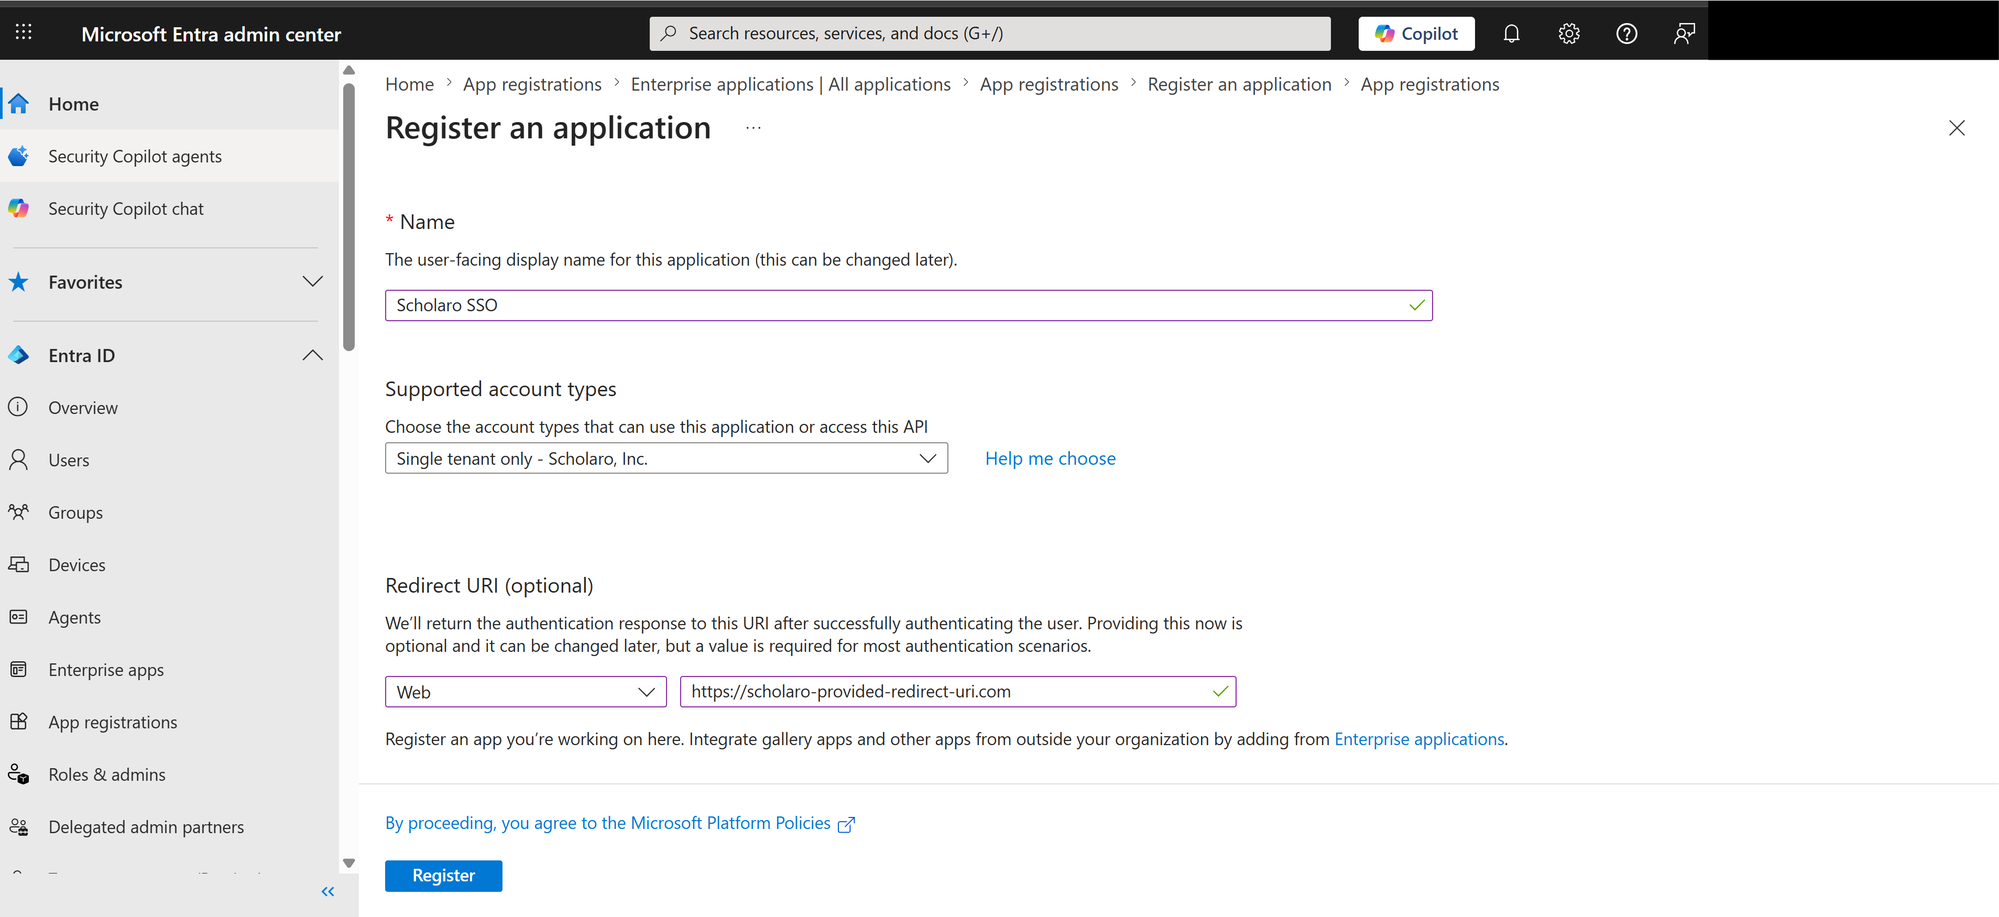
Click Register.
2. Add the logout URLs
You can do this now if your connection exists, or in step 7. Open Authentication. Entra splits these across two places, which catches people out:
- Add the Post-logout redirect URI to the same Redirect URIs list as the callback. Entra has no separate field for it and will only return users to an address registered there.
- Put the Front-channel logout URI in the Front-channel logout URL field. There is one per application, and it must be HTTPS.
Both are optional, and normal sign-in works without them. Scholaro does not yet sign users out of Entra, so they have no effect today.
Using the new Authentication (Preview) blade?
It shows only redirect URIs. The front-channel logout URL is on its Settings tab.
Leave the implicit grant checkboxes unticked. Scholaro uses the authorization code flow with PKCE.
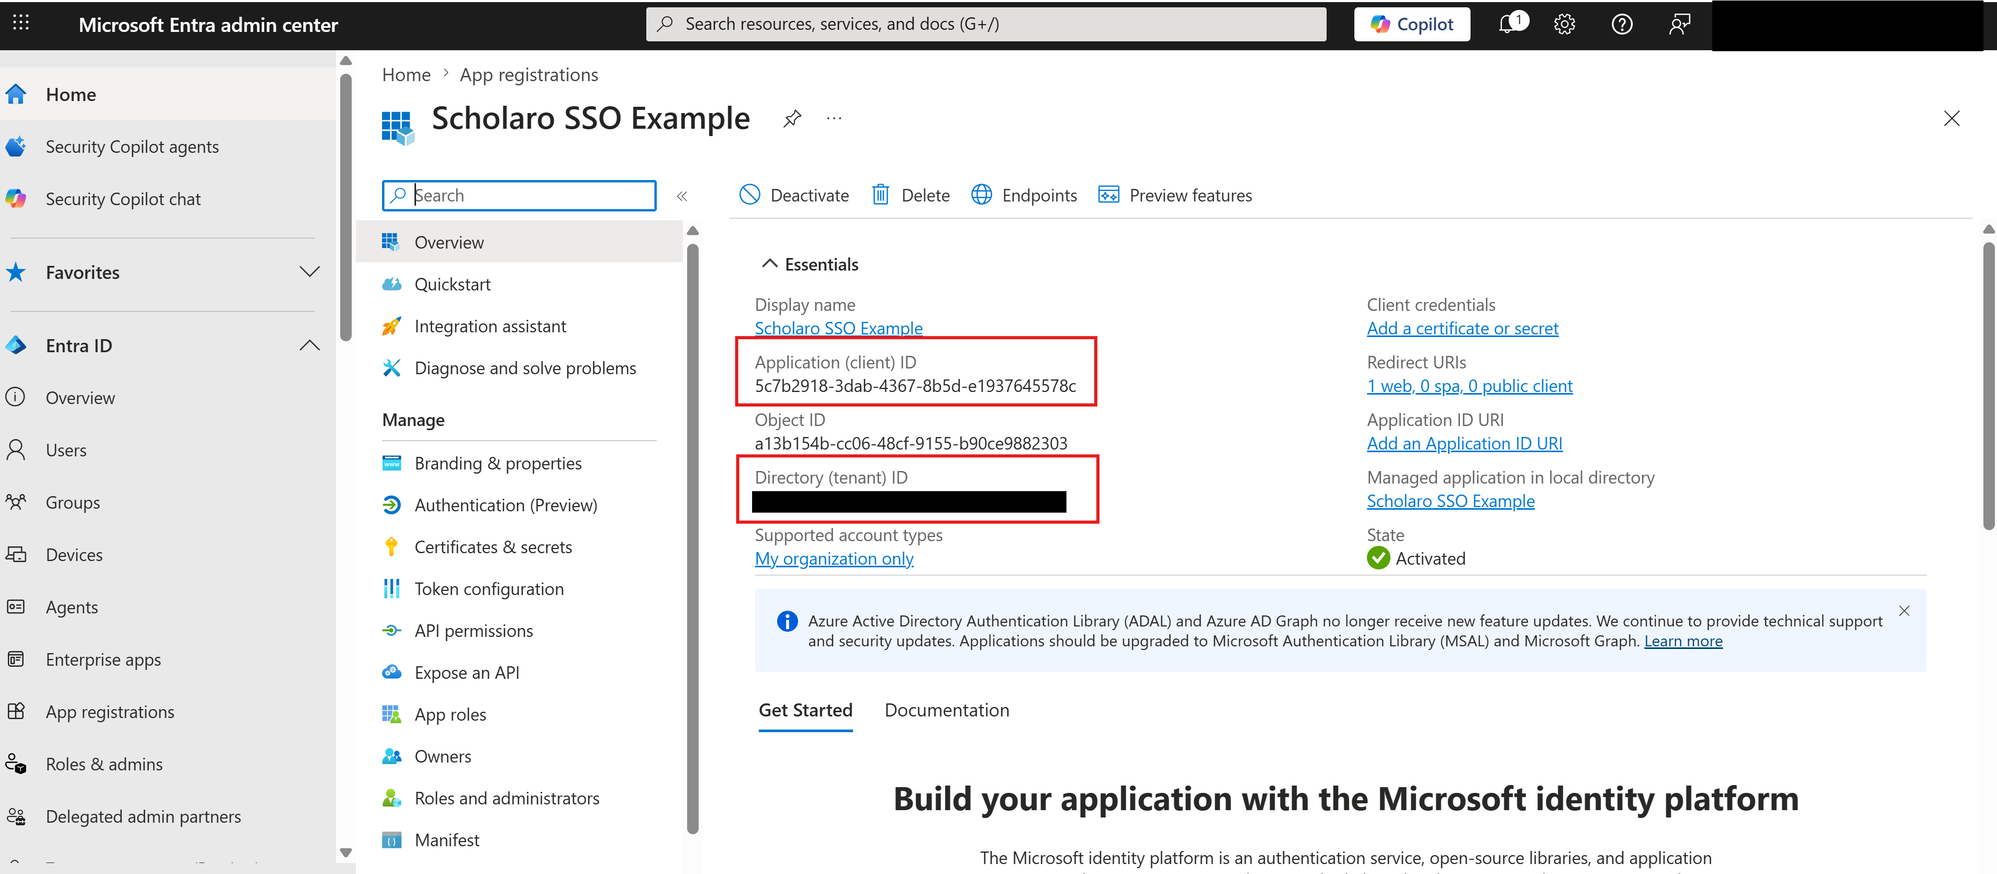
3. Copy the application and tenant IDs
On the application's Overview page, copy:
- Application (client) ID
- Directory (tenant) ID
The tenant ID goes into the Authority in step 6; the client ID is entered as-is.
4. Create a client secret
Go to Certificates & secrets -> Client secrets and click New client secret.
- Description:
Scholaro Secret - Expires: choose your organization's preferred lifetime (for example, 730 days / 24 months).
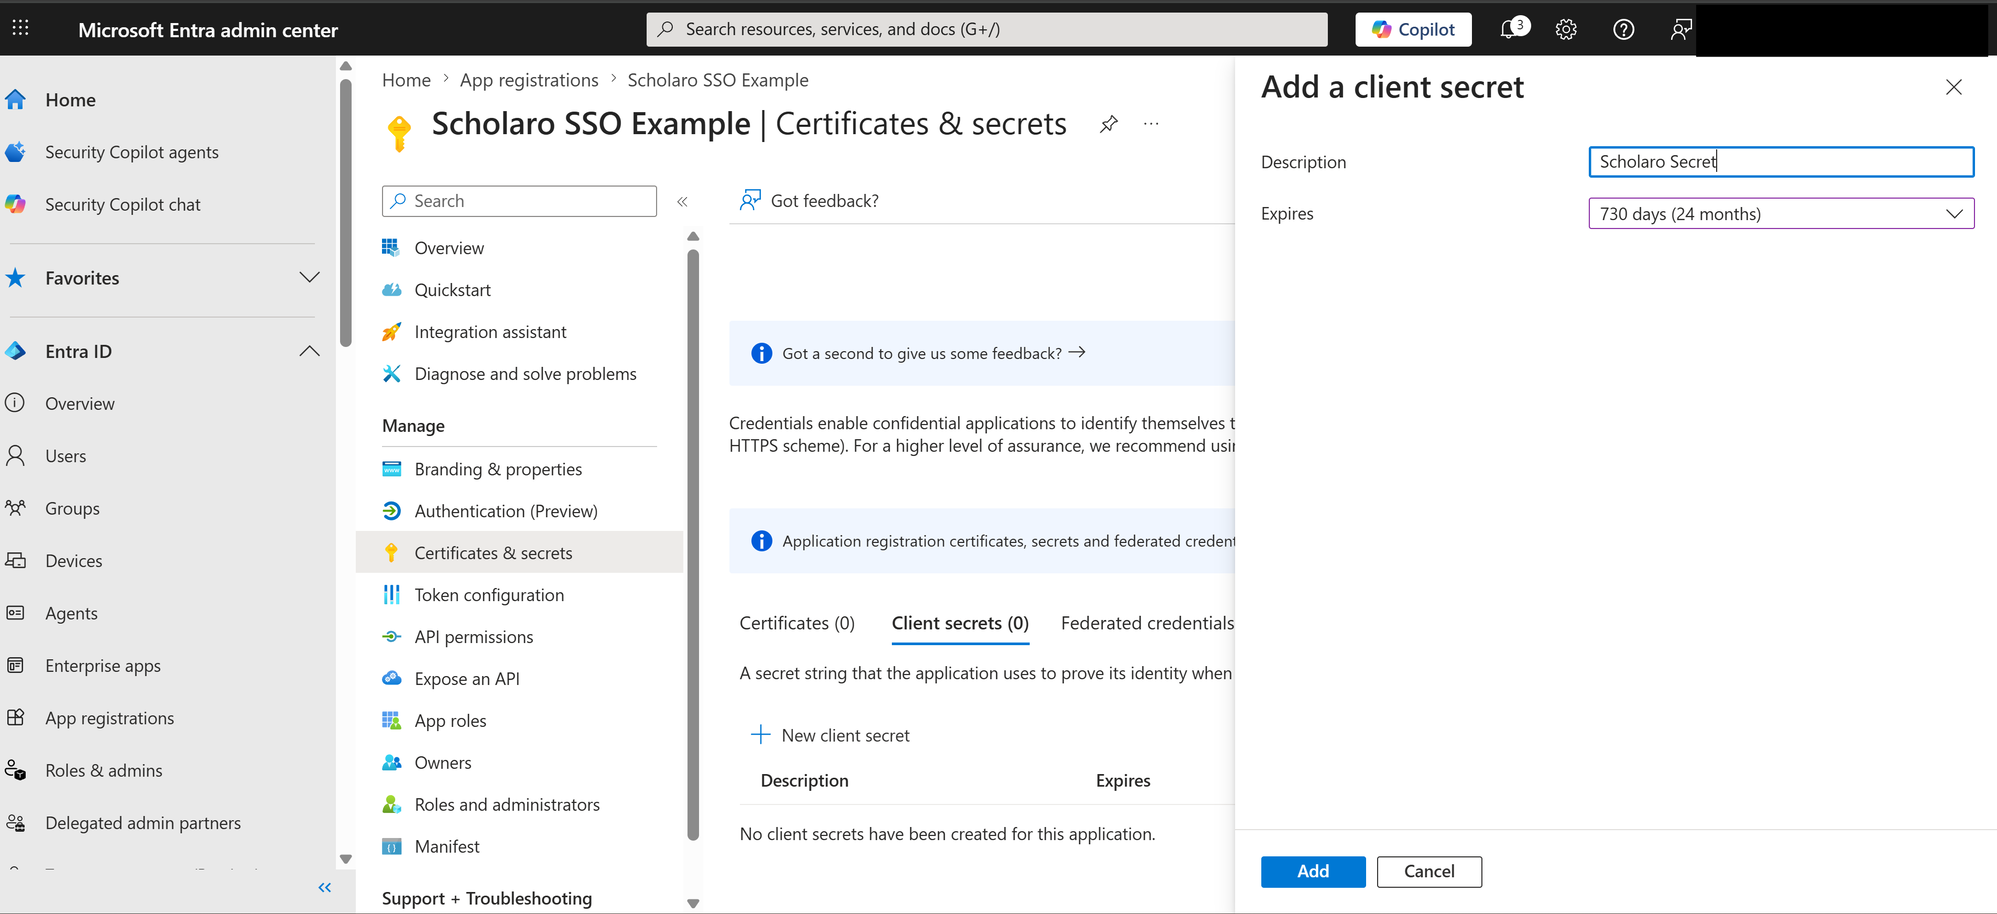
Click Add, then copy the secret Value immediately — not the Secret ID beside it.
Warning
The Value is shown only once. Paste it straight into your Scholaro connection; you cannot retrieve it again after leaving this page. Scholaro stores it encrypted and never displays it back.
Renew the secret before it expires
Client secrets expire on the date you chose, and sign-in stops working when one does. Note the date now. To rotate it, create the new secret here, then turn your Scholaro connection off, paste the new value, and turn it back on. Adding a secret does not revoke the existing one, so you can prepare the new one in advance.
5. Grant admin consent
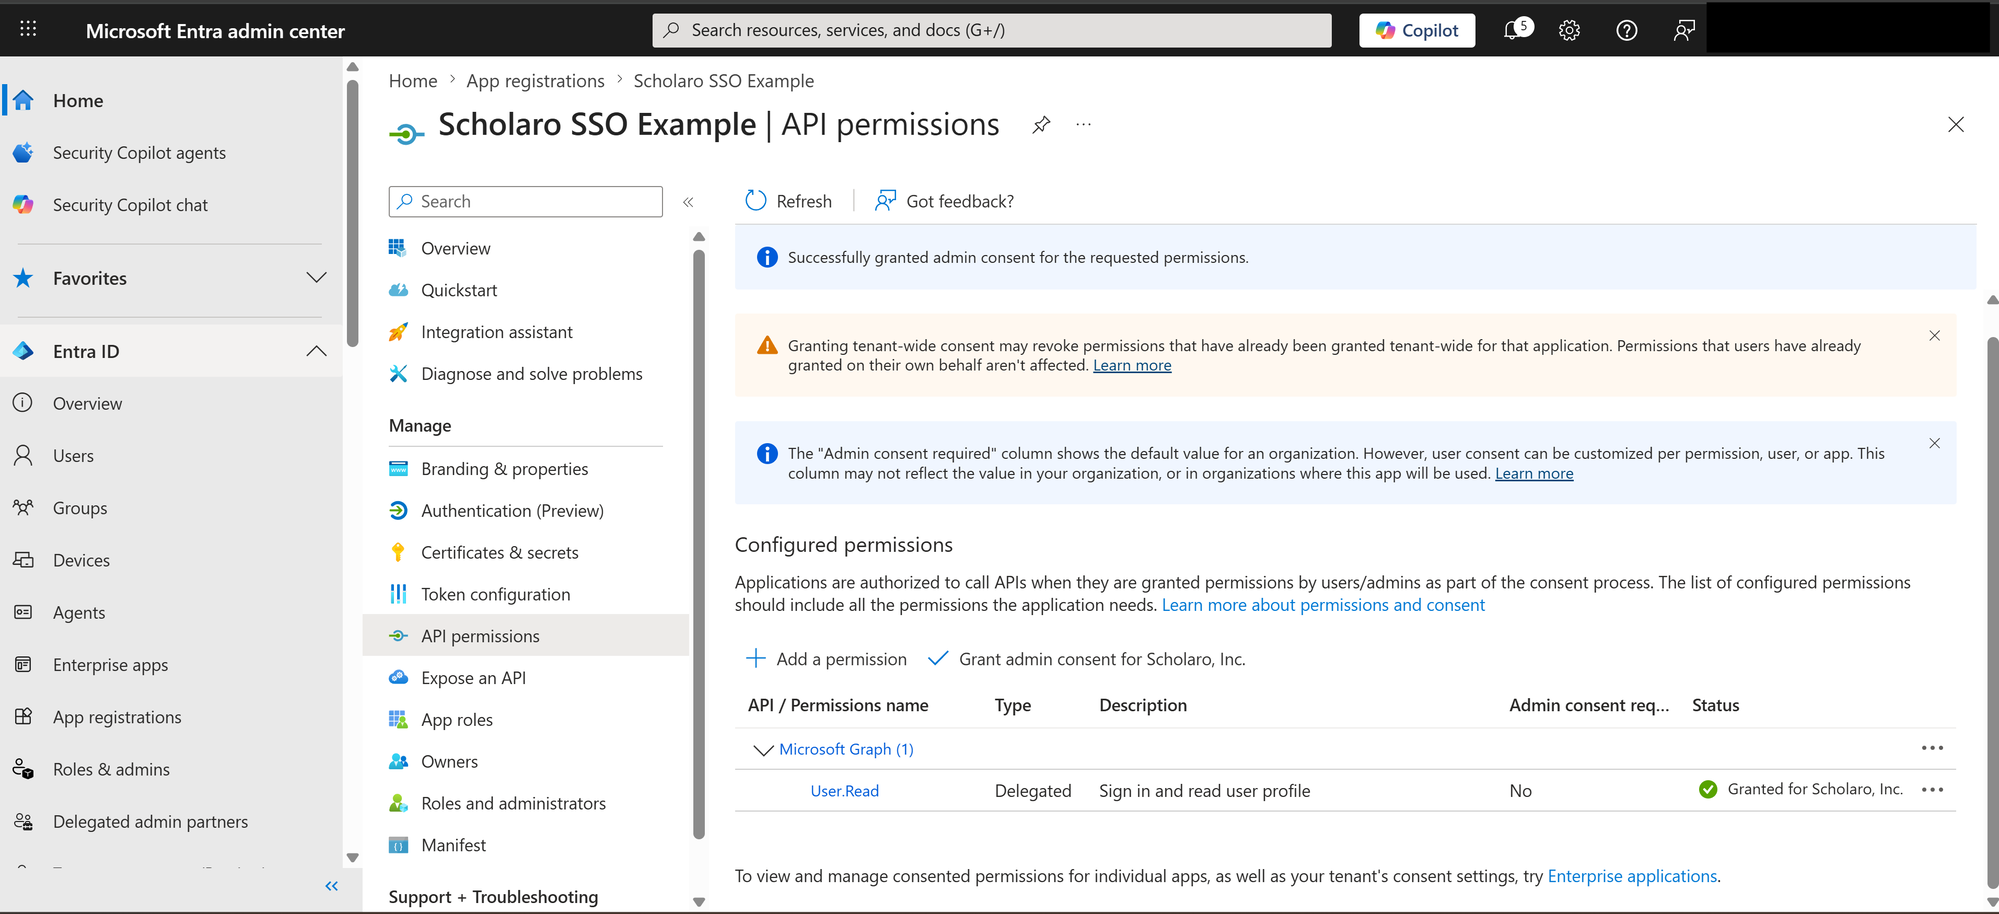
Open API permissions. A new app registration already includes the Microsoft Graph -> User.Read (delegated) permission, which is all Scholaro needs — you do not need to add any permissions. Scholaro requests the standard OpenID Connect scopes (openid, profile, email, and offline_access) at sign-in.
Click Grant admin consent for <your organization> and confirm. This pre-approves those scopes for all users so they are not individually prompted on first sign-in — and it is required if your tenant has user consent disabled. The Status column then shows a green "Granted" check.
6. Create the connection in Scholaro
Under Settings → SSO, choose Add connection, pick OpenID Connect, and fill in:
| Field | Value |
|---|---|
| Authority | https://login.microsoftonline.com/<tenant-id>/v2.0 |
| Client ID | Application (client) ID, from Overview |
| Client secret | The value copied in step 4 |
| Scopes | Leave blank |
Save.
7. Add Scholaro's URLs to Entra
Open Setup URLs on the connection. Back in Entra, under Authentication, make sure the Redirect URI is registered, and add the logout URLs as described in step 2.
Then assign the application to your users in Enterprise applications if your tenant requires assignment.
8. Turn it on and test
Use the Turn on button at the top of your connection's page, then sign in with an address in your domain. You should be redirected to Microsoft and returned to Scholaro signed in.
Tip
If sign-in fails, check the Redirect URI in Entra matches the one on your connection's page exactly, including https:// and any trailing slash. If Microsoft reports AADSTS7000218, the client secret is missing or wrong — re-enter it.
If anything is wrong, turn the connection off. Sign-in returns to normal immediately.