Okta SSO Setup
This guide explains how to connect Okta to Scholaro using OpenID Connect (OIDC).
Read Setting up SSO in Scholaro first. You will create the app here, create the connection in Scholaro with its credentials, then come back to add Scholaro's Redirect URI — it does not exist until the connection is saved.
Prerequisites
- Administrator access to your Okta org (the Admin Console, e.g.
https://<your-org>-admin.okta.com). -
Later, the Redirect URI from your connection's Setup URLs page in Scholaro. It looks like:
https://www.scholaro.com/login/sso/<your-connection>/callback
Note
Use the exact Redirect URI Scholaro gave you — the example above is illustrative.
1. Create an OIDC app integration
In the Okta Admin Console, go to Applications -> Applications and click Create App Integration.
- Sign-in method: OIDC - OpenID Connect
- Application type: Web Application
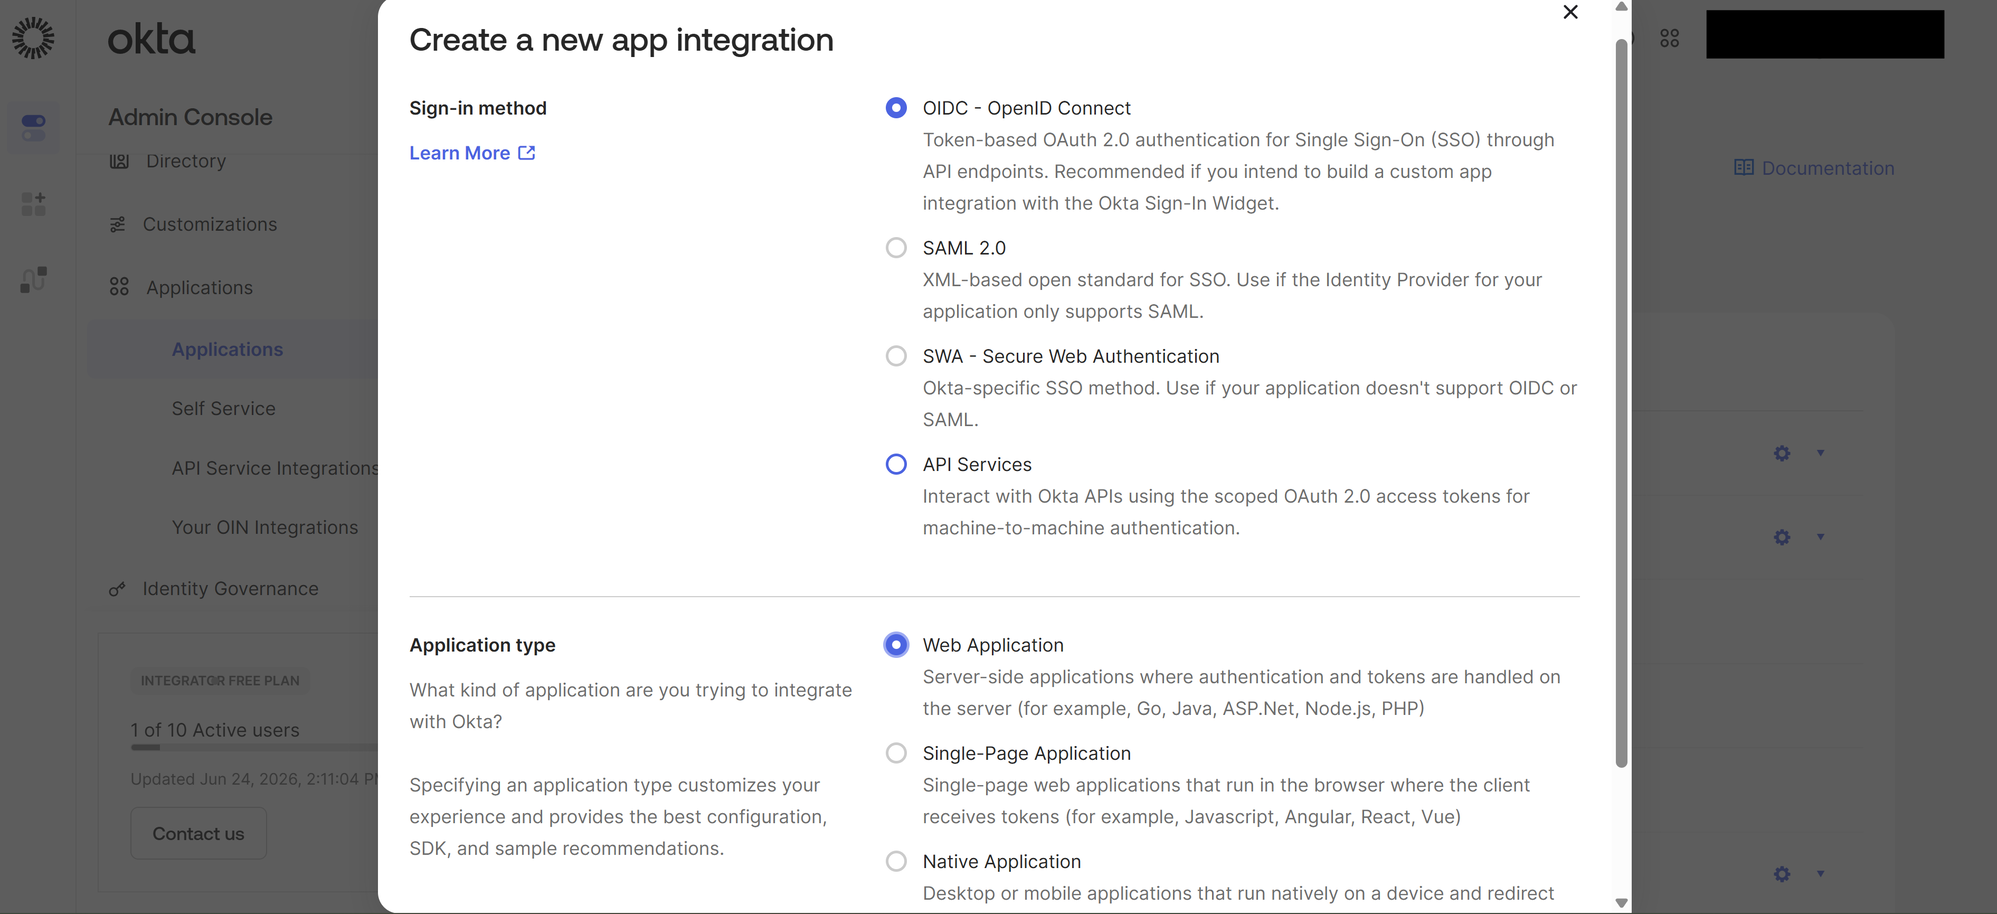
Click Next.
2. Configure the app
On the New Web App Integration screen:
- App integration name:
Scholaro SSO(or any name your team will recognize). - Grant type: leave Authorization Code selected, and also tick Refresh Token so Scholaro can detect users you deactivate.
- Sign-in redirect URIs: paste Scholaro's Redirect URI if the connection already exists; otherwise leave the default and replace it in step 6.
- Sign-out redirect URIs: optional. Scholaro does not yet sign users out of Okta.
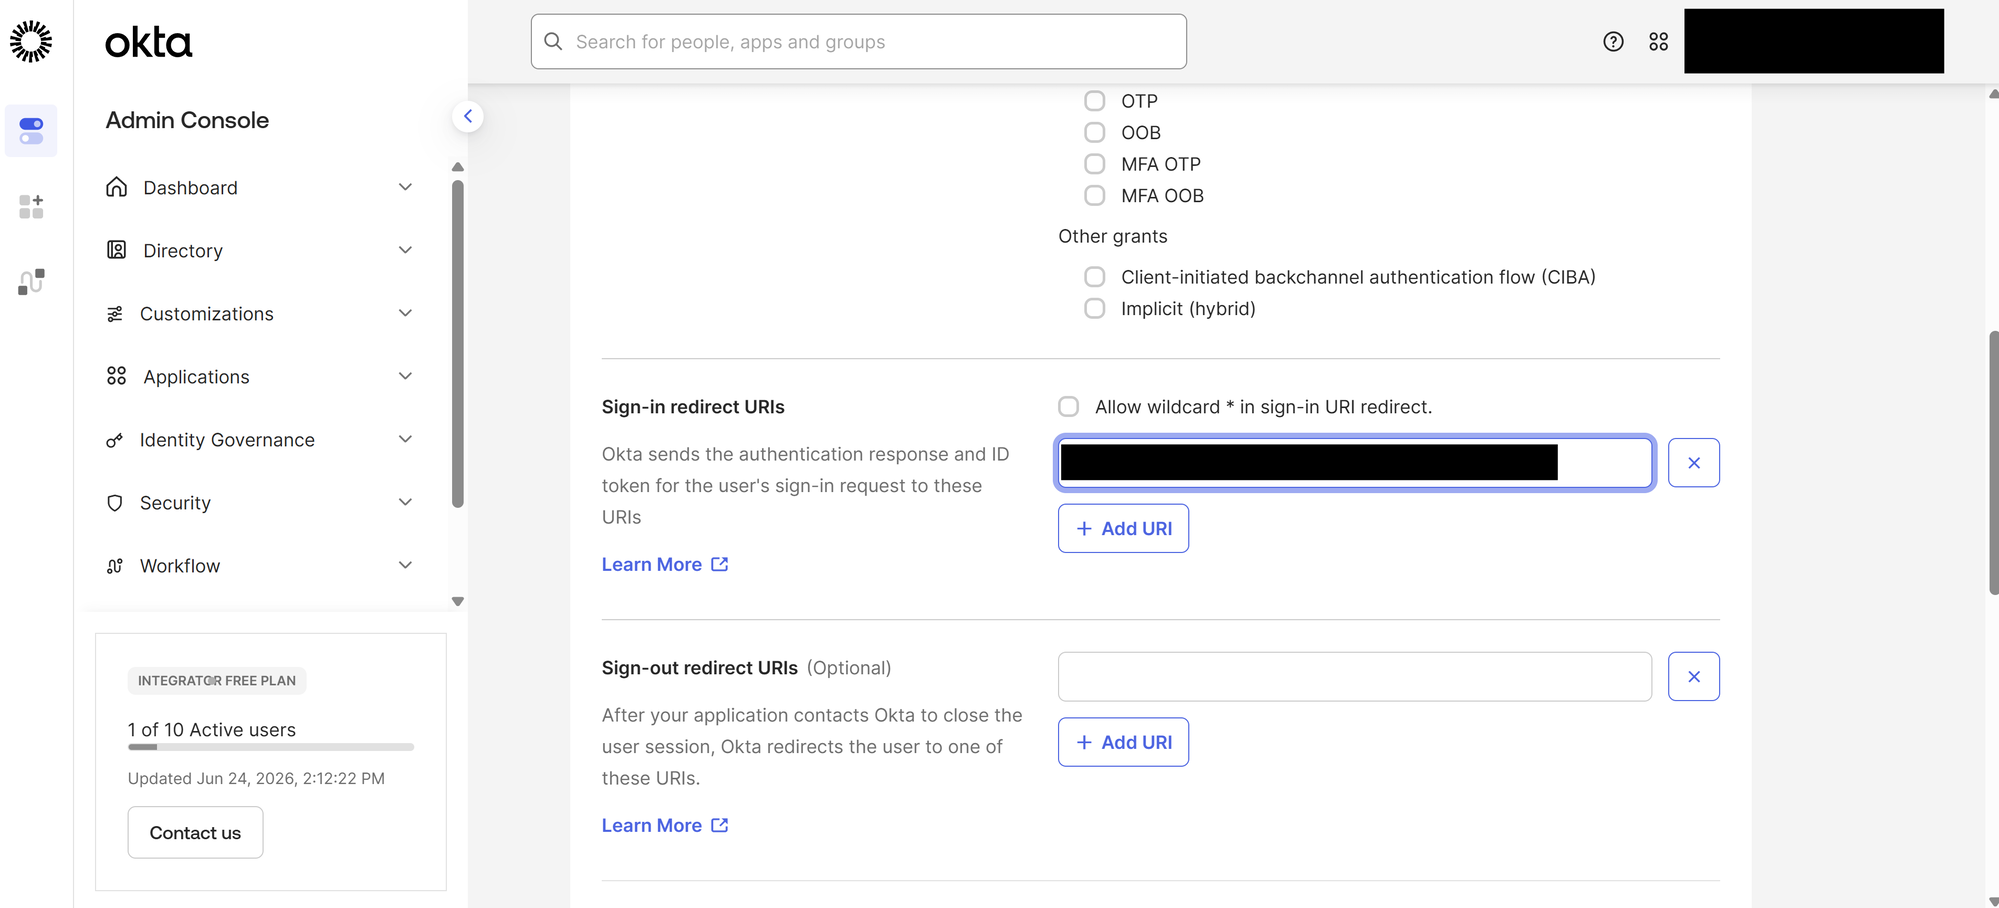
Under Assignments, choose who can use the app — for example Allow everyone in your organization to access, or limit it to specific groups.
Click Save.
3. Copy the client credentials
On the application's General tab, copy:
- Client ID
- Client secret
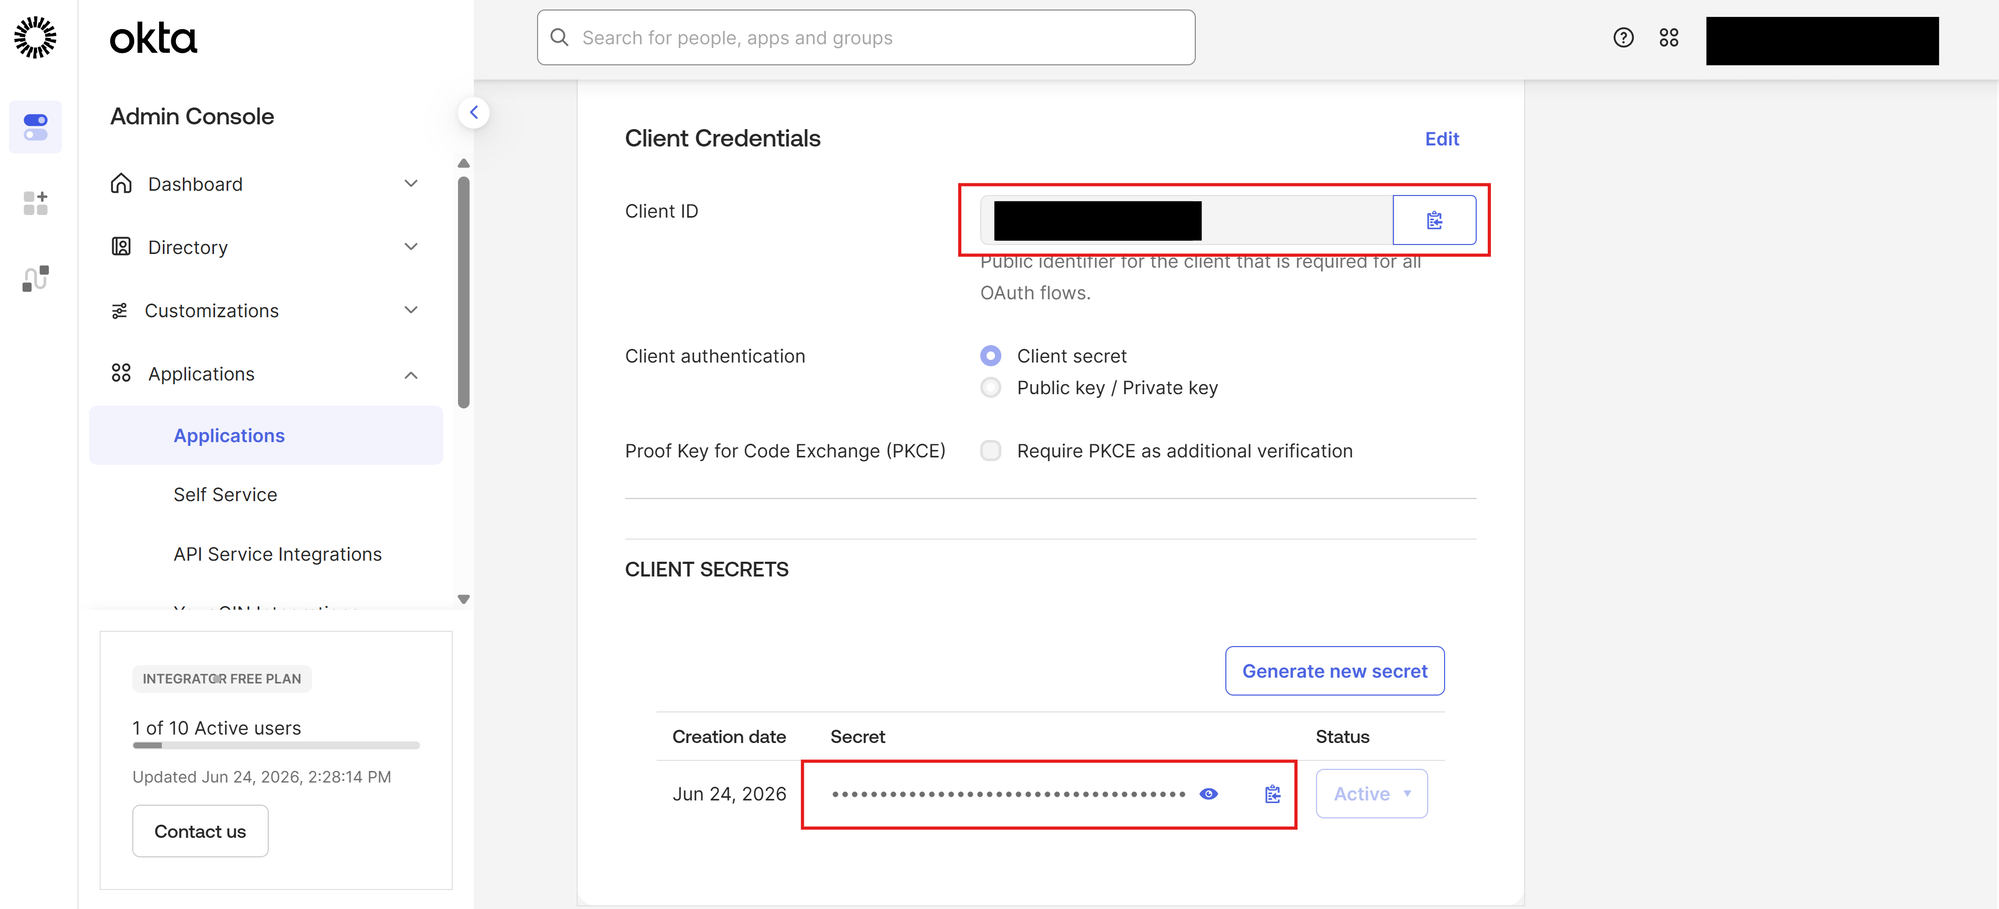
Warning
Paste the client secret straight into your Scholaro connection rather than sending it anywhere. Scholaro stores it encrypted and never displays it back.
4. Confirm your issuer URL
Your Okta issuer is your org URL, for example https://<your-org>.okta.com. You can confirm it by opening https://<your-org>.okta.com/.well-known/openid-configuration and reading the issuer value.
Note
Scholaro requests the standard OpenID Connect scopes (openid, profile, email, and offline_access). Okta issues a refresh token for offline_access only when the Refresh Token grant type is ticked (step 2); without it sign-in still works, but deactivated users keep access until their 24-hour session ends.
5. Create the connection in Scholaro
Under Settings → SSO, choose Add connection, pick OpenID Connect, and fill in:
| Field | Value |
|---|---|
| Authority | https://<your-org>.okta.com |
| Client ID | Application -> General tab |
| Client secret | Application -> General tab |
| Scopes | Leave blank |
Save.
6. Add Scholaro's Redirect URI to Okta
Open Setup URLs on the connection, copy the Redirect URI, and paste it into the app's Sign-in redirect URIs in Okta, replacing the default. Save, then make sure your users are assigned to the application.
7. Turn it on and test
Use the Turn on button at the top of your connection's page, then sign in with an address in your domain. You should be redirected to Okta and returned to Scholaro signed in.
Tip
If sign-in fails, check that the Sign-in redirect URI in Okta matches the one on your connection's page exactly, and that your test user is assigned to the app.
If anything is wrong, turn the connection off. Sign-in returns to normal immediately.