Google Workspace SSO Setup
This guide explains how to connect Google Workspace to Scholaro using a custom SAML application — the standard way to set up SSO for a third-party app in the Google Admin console.
Read Setting up SSO in Scholaro first. The ACS URL and SP Entity ID below come from your connection's Setup URLs page, and they do not exist until the connection is saved.
Google provides metadata as a file, not a URL
Scholaro reads your identity provider's metadata from an https:// URL and cannot accept an uploaded file. Google Workspace only offers the metadata as a download, so to set this up yourself you need to host the downloaded XML at an https:// address Scholaro can reach. If that is not practical, ask your Scholaro representative to set the connection up for you.
Prerequisites
- A super administrator account for your Google Workspace domain (admin.google.com).
-
The ACS URL and SP Entity ID from your connection's Setup URLs page in Scholaro. They look like:
- ACS URL:
https://www.scholaro.com/login/sso/<your-connection>/Acs - SP Entity ID:
https://www.scholaro.com/login/sso/<your-connection>/Saml2
- ACS URL:
Note
Use the exact ACS URL and Entity ID Scholaro gave you — the examples above are illustrative.
1. Create a custom SAML app
In the Google Admin console, go to Apps -> Web and mobile apps, click Add app, then Add custom SAML app.
- App name:
Scholaro - (Optional) upload an app icon.
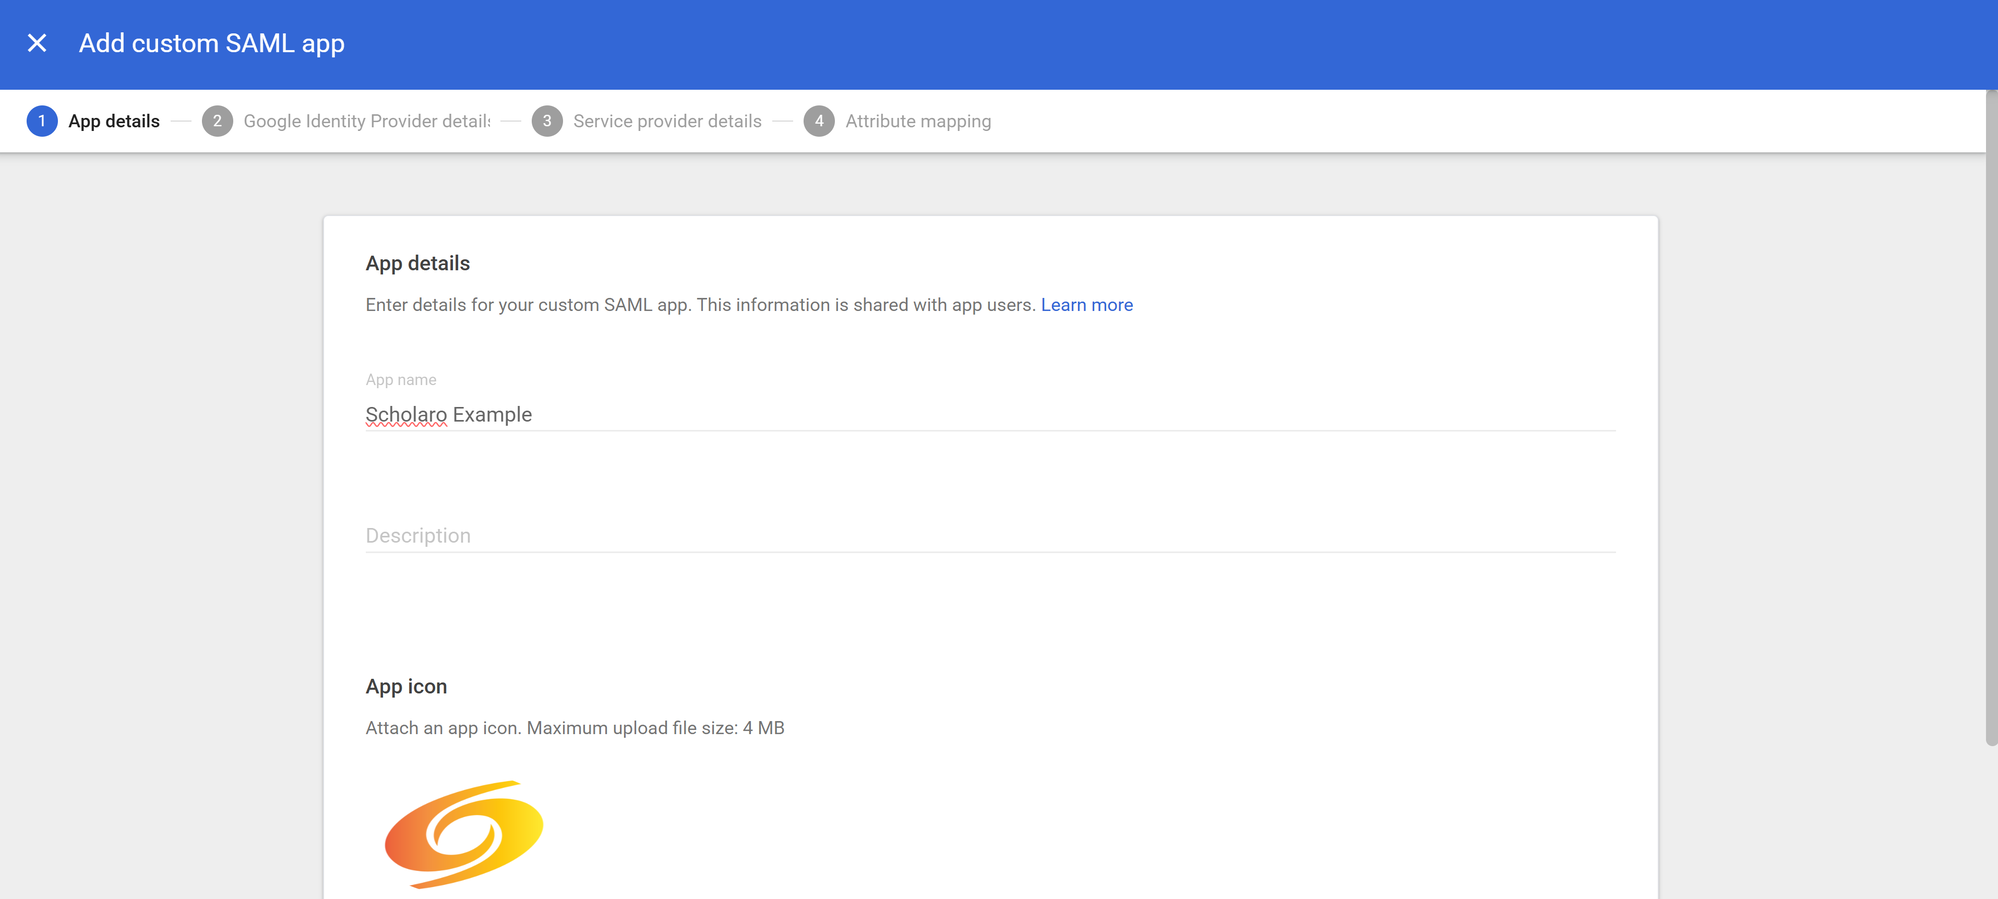
Click Continue.
2. Copy Google's identity provider details
On the Google Identity Provider details step, download the IdP metadata and note:
- SSO URL
- Entity ID
- Certificate (included in the metadata download)
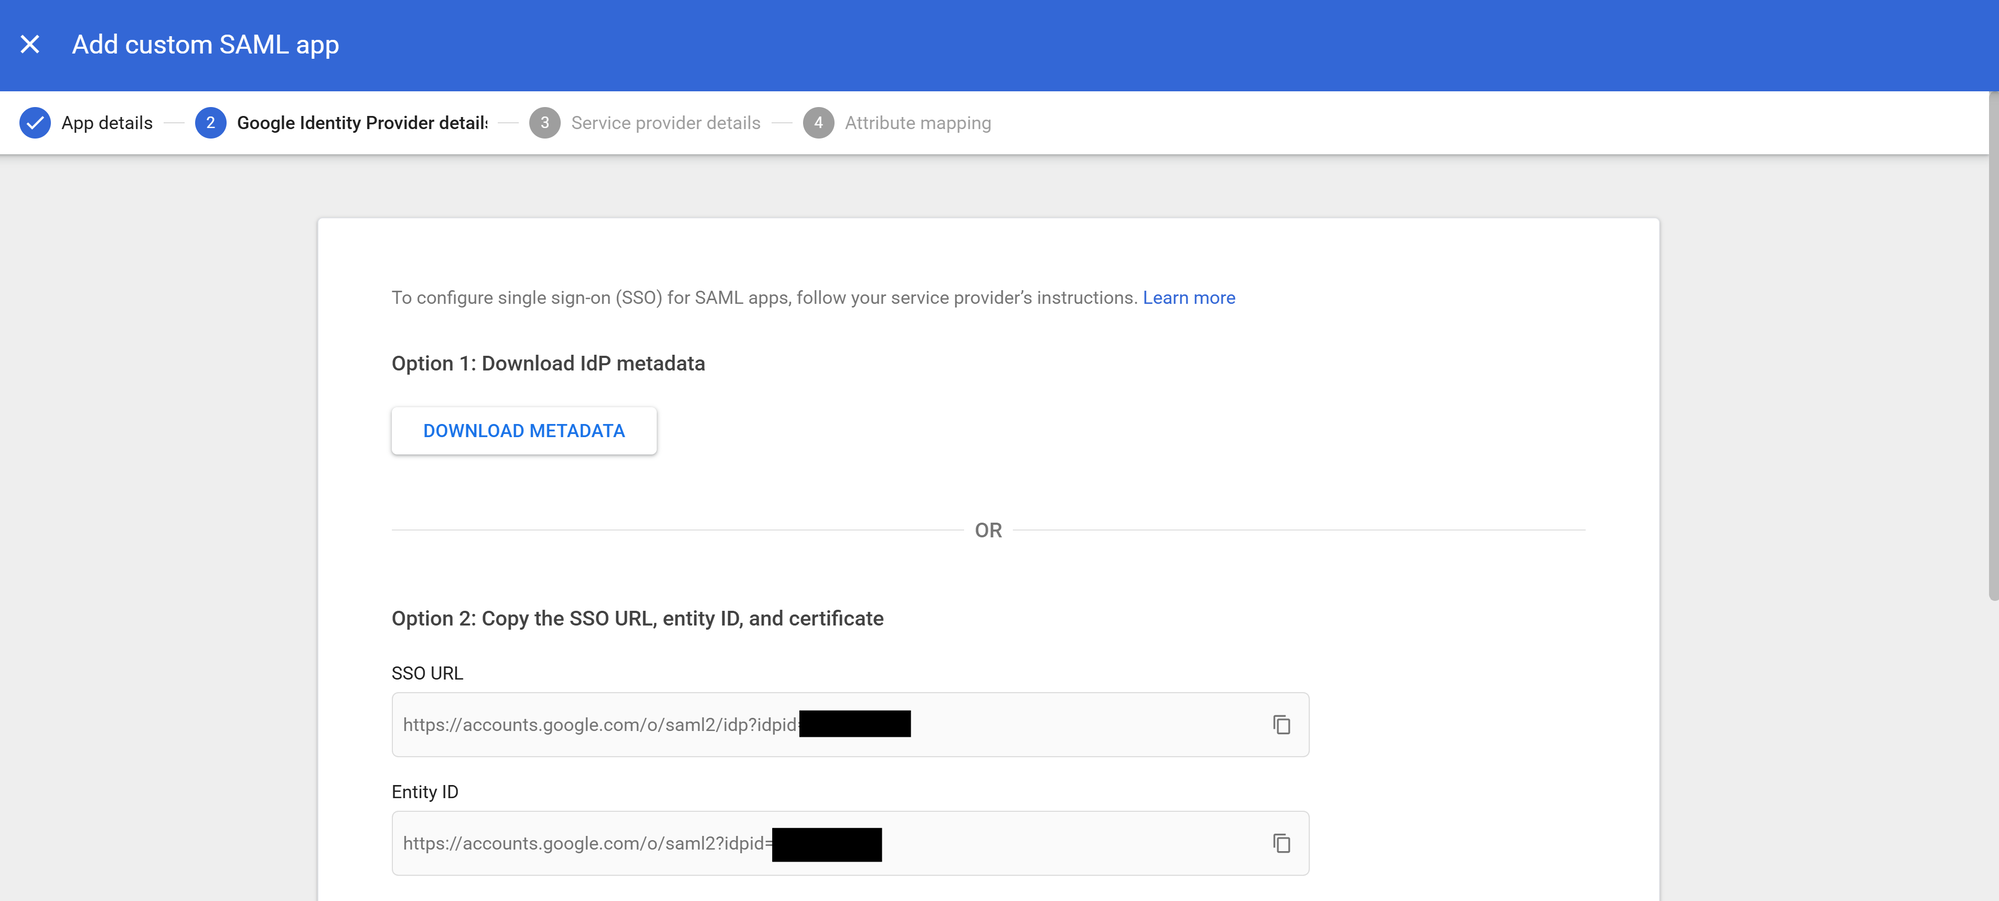
Click Continue.
3. Enter Scholaro's service-provider details
On the Service provider details step, enter the values from your connection's Setup URLs page. If you have not created the connection yet, enter a temporary value, finish the wizard, and come back to Service provider details after step 6:
- ACS URL: the ACS URL from Scholaro.
- Entity ID: the SP Entity ID from Scholaro.
- Name ID format:
EMAIL. - Name ID: Basic Information > Primary email.
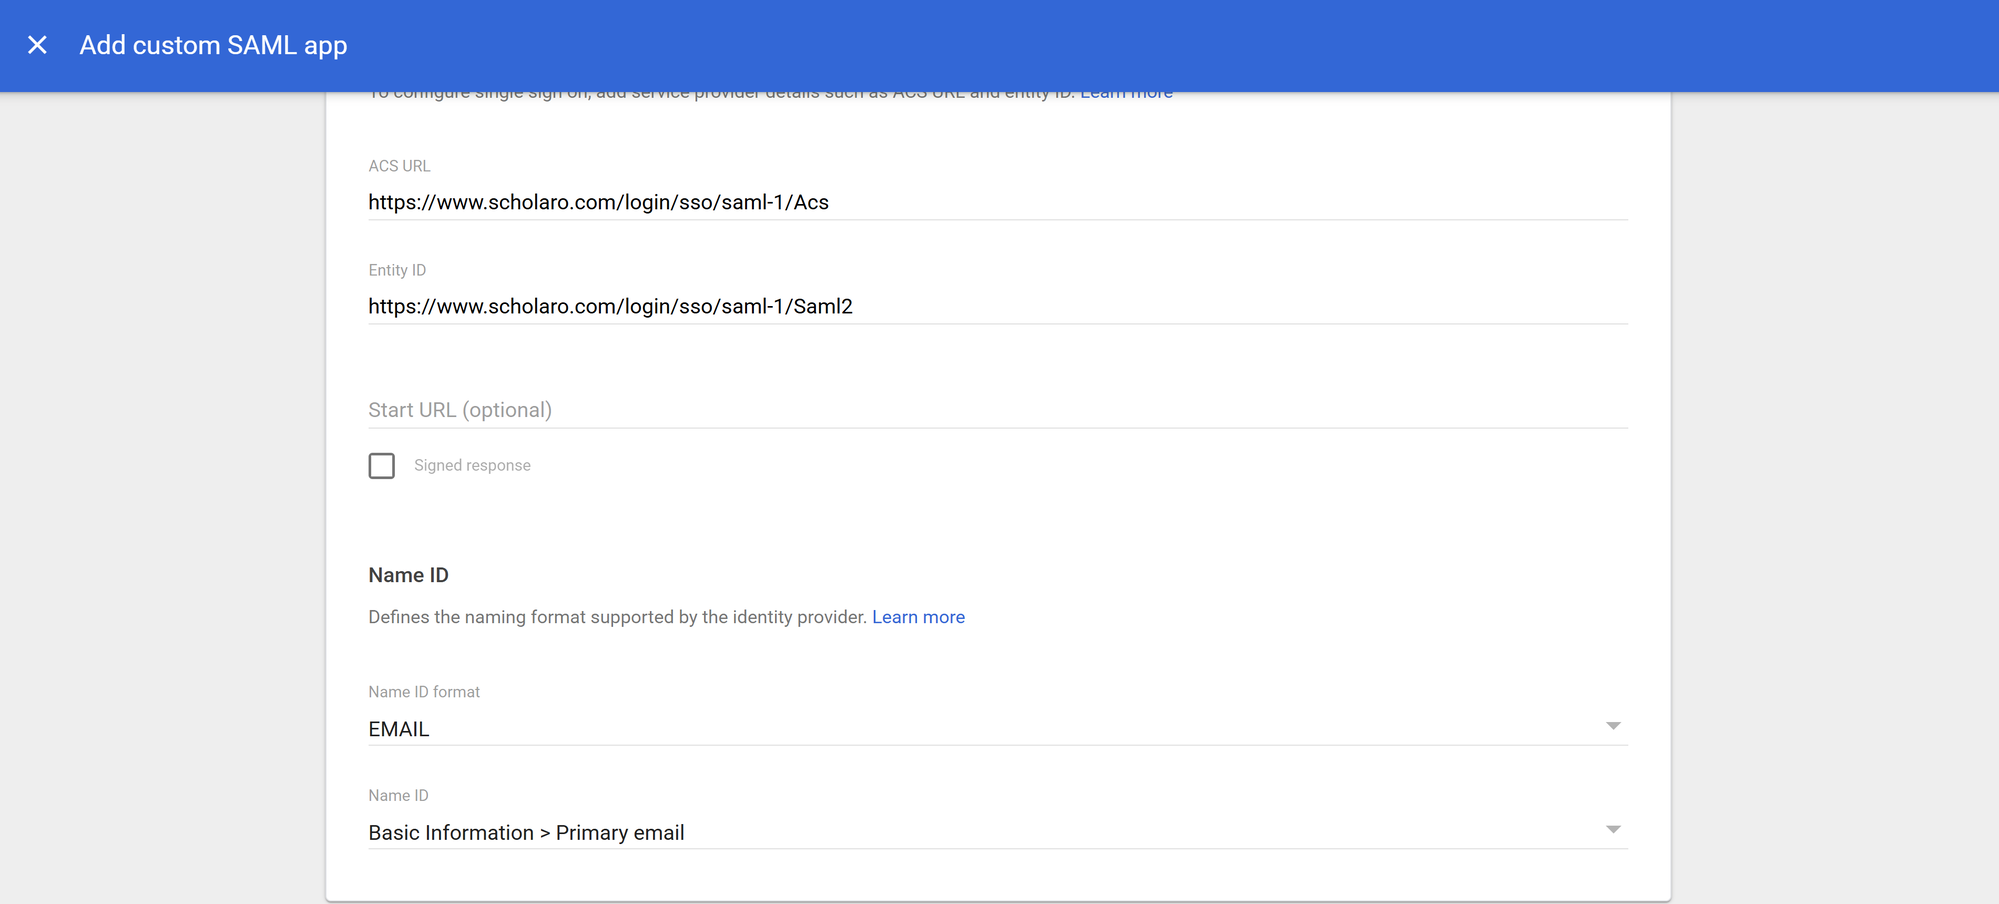
Click Continue.
4. Skip attribute mapping
On the Attributes step, no mapping is needed: the user's email is already carried by the Name ID, and Scholaro does not currently import names from Google. Click Finish.
5. Turn the app on
A new app is OFF for everyone by default. Open the app, click User access, and turn it ON for the organizational units (or groups) whose members should use Scholaro SSO. Save.
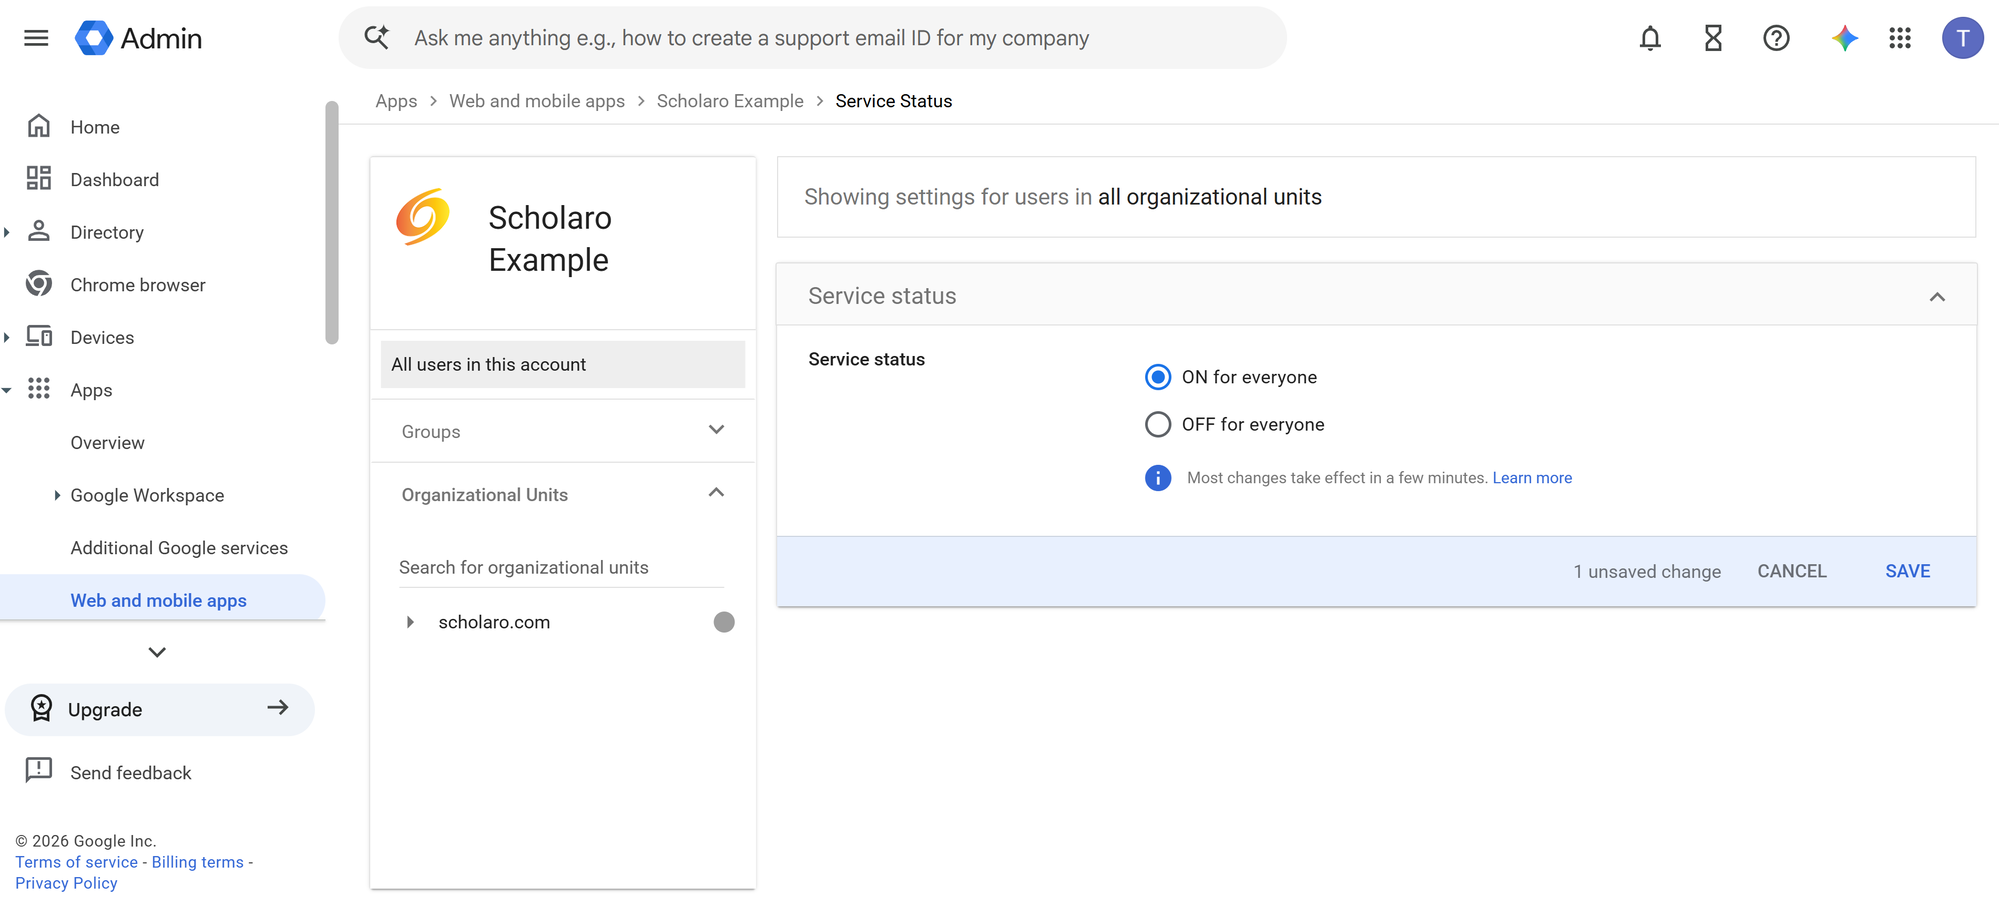
Note
Changes to user access can take a few minutes to propagate in Google Workspace.
6. Create the connection in Scholaro
Under Settings → SSO, choose Add connection, pick SAML 2.0, and fill in:
| Field | Value |
|---|---|
| IdP Entity ID | The Entity ID from Google Identity Provider details (step 2) |
| IdP metadata URL | The https:// address where you host the metadata file downloaded in step 2 |
Save, then make sure the ACS URL and Entity ID in Google match the connection's Setup URLs page.
When Google's certificate changes
When you renew the signing certificate in Google, download the new metadata and replace the hosted file.
7. Turn it on and test
Use the Turn on button at the top of your connection's page, then sign in with an address in your domain. You should be redirected to Google and returned to Scholaro signed in.
Tip
If sign-in fails, confirm the app is turned ON for the test user's organizational unit, and that the ACS URL and Entity ID in Google match your connection's page exactly.
If anything is wrong, turn the connection off. Sign-in returns to normal immediately.